Prefilter Assembly and Cleaning Instructions
[cmsms_row data_width=”boxed” data_padding_left=”3″ data_padding_right=”3″ data_color=”default” data_bg_color=”#ffffff” data_bg_position=”top center” data_bg_repeat=”no-repeat” data_bg_attachment=”scroll” data_bg_size=”cover” data_bg_parallax_ratio=”0.5″ data_color_overlay=”#000000″ data_overlay_opacity=”50″ data_padding_top=”0″ data_padding_bottom=”50″][cmsms_column data_width=”1/1″][cmsms_text animation_delay=”0″]

[/cmsms_text][cmsms_heading type=”h1″ font_weight=”400″ font_style=”normal” text_align=”left” target=”self” custom_colors=”true” color=”#4ecdc4″ color_transparency=”100″ margin_top=”0″ margin_bottom=”20″ animation_delay=”0″]Prefilter Assembly and Cleaning Instructions[/cmsms_heading][cmsms_text animation_delay=”0″]
Prefilter Assembly Instructions:
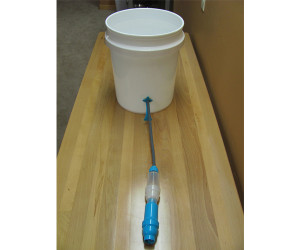
1. Attach Prefilter to hose connector and final filter as shown
Prefilter Cleaning Instructions:
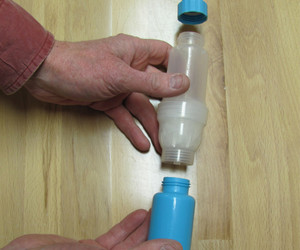
1. Separate Prefilter from Final Filter and hose as shown
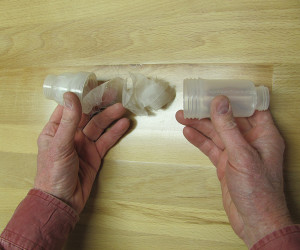
2. Remove fabric mesh and rinse completely.
4. Replace fabric by stuffing it into the small end of the filter housing. Do not fold or wrap fabric as it will create channels that will allow water to bypass the filter mesh.
5. Reattach Prefilter to hose connector and final filter as shown.
Note: Only the Prefilter can be separated and cleaned. The .1 micron final filter is permanently sealed and cannot be separated. It can only be cleaned by back flushing.
[/cmsms_text][cmsms_text animation_delay=”0″]
[/cmsms_text][/cmsms_column][/cmsms_row]


